For this week, we learnt how to make a cinematograph and using smart object/smart filter. We first learned how to deal with smart objects and smart filters.
Smart Object/Smart Filters
For as long as I have used Photoshop, I realised that sometimes, texts and pictures can be turned into a smart object. At times, I would despise this because I could not do much to the object. I would often just rasterize the layer and move on (probably will still do that).
We learnt that we can use smart filters as well. For the photo (which is down below – fig.1), we just used Gaussian blur. With the Gaussian blur, we can control how blurred out we want it to be.
We can find Gaussian Blur this way:
Filter -> Blur -> Gaussian Blur
Here is what I managed to achieve with that and playing around with the opacity n filters (screen, color dodge, overlay etc.):

Here is the original untouched image:

CrocFrog
After we did the above, we moved on to making a crocodile frog hybrid. The colours of the pictures did not quite match so I had to alter the hue and saturation a little bit. After that, I selected the crocodile’s head and brought it to the frog picture. This was half the job done. Then, after placing it where it looked best, I smoothen things out with the clone stamp, blur and other editing techniques. Here is the final picture:
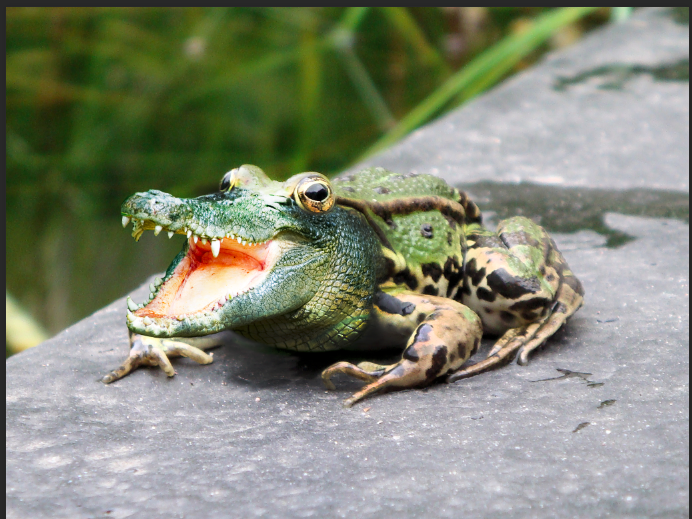
Here are the original pictures:


Cinematograph
Next, this will be made our assignment as well. We were asked to make a cinematograph. There is no easy way to explain cinematographs, but in class, we watched a tutorial that was so easy to understand. I referenced it quite a few times while making my assignment.
Here’s the video:
Then, after watching this tutorial, we made a cinematograph in class.
Here is the final gif:
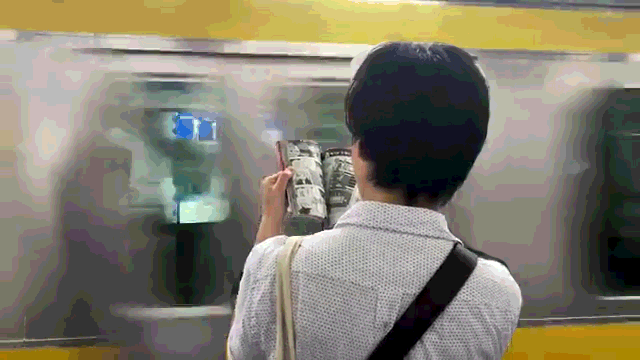
The gif above is not clean and if you pay attention closely, the book is still moving. However, this was as good a start as any. So after we did this, we had to make our own gif. Here is my gif starring my friend Sandra (https://saalgac278.wordpress.com/):

Here is one where I slowed down the eye movement:
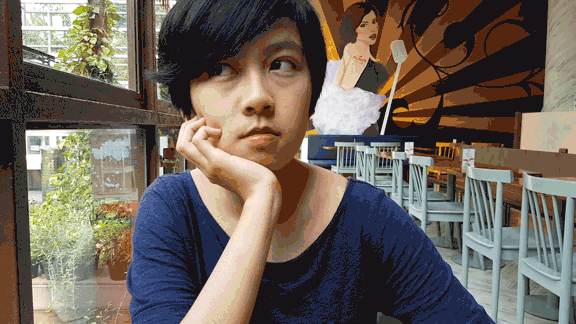
The gif above was done by adding a picture where her eye stopped completely to create the illusion that the video was slower.
So a few tips you will need to remember when making a cinematograph:
- USE A TRIPOD – I cannot stress this enough. Unless you have hands as steady as a tripod, the background will move too much and almost none of your footage will be usable. I did this without using a tripod and had to cut out a lot of the video itself.
- Make sure your video ends where it started. This gives the looped illusion. Setting things to “Forever” may loop it, but if it does not end where it started, it will look choppy.
- Aesthetics. This one isn’t exactly important, but as a designer, everything must look good. Take that into account when filming.
